I’m really excited to introduce you to my friend Meghan today. First off, she’s got some great tips for organizing your photos {seeing as mine are scattered all over my desktop, I’m going to be using her system for sure}, and second, she is just such an awesome and inspiring person. Her photos are amazing, her heart is beautiful, and her story is a unique and important one— and she is living it so well. Meghan is one of those people I am incredibly thankful to have met here on the internet, and I’m so glad she’s taken the time to create this post for my little space today. ♥

Hello sweet dear friend readers! My name is Meghan and I write a little blog named eat.live.make about living a creative, simple and healthy life. I am so excited to be over here today (thank you Anna!) to share with you guys how I organize my little family’s adventure photos.
After starting my own photography business last year I realized I needed a better way to organize my photos than just putting them in folders on my computer. I started using this method for our personal travel photos as well, and it has made things so much easier! Each year I get an album printed out from Artifact Uprising of our year’s adventures, and this year it took me half the time as it did last year because I had everything organized and ready to go.
This system is super easy, and just takes a bit of forethought when you start to upload photos from your camera into your computer. Here’s how you do it:
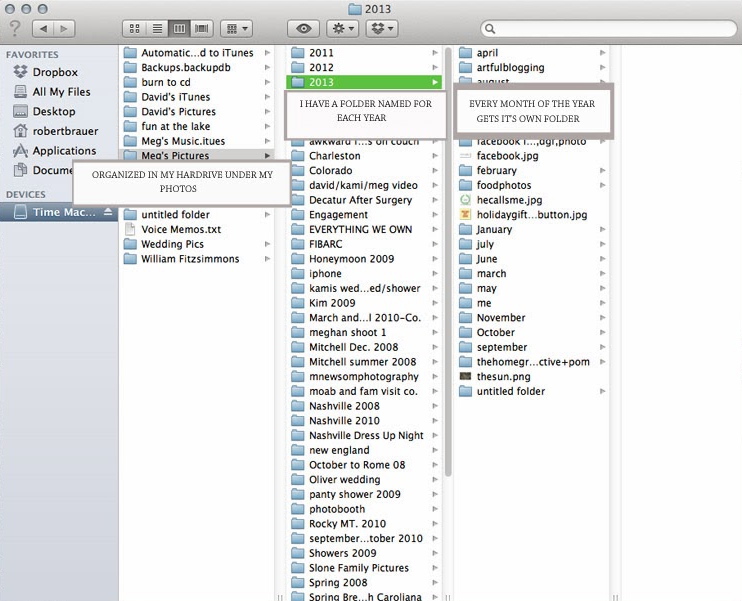
Each year I create a yearly folder in our computer hard drive. You can see that I started the folders in 2011 above. In each of those folders I have a folder for each month of the year. You can see 2013’s folder’s contents on the far left of my finder screen shot.
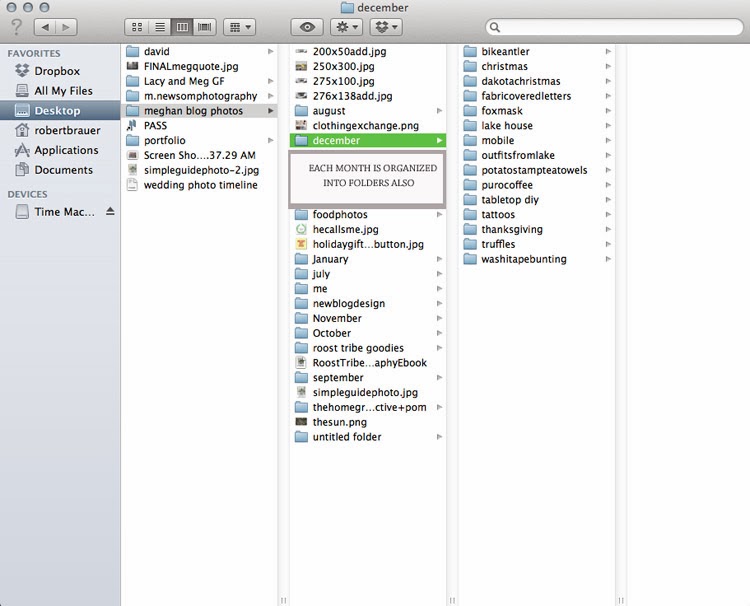
Each month of the year has sub-folders. For December’s sub folders I have several projects I did for my blog, along with our trip to the beach, our trip to the lake and some recipe pictures.
They KEY to this whole process is to create each folder BEFORE you upload your pictures so that your uploading photos will have a file to go into.
For example, if I was about to upload photos from our recent lake house trip, I would get on my computer go to>>meghan blog photos>>January>> then create a NEW folder that said “lake house”. Then in would import my photos into the “lake house” folder!
Pretty easy, huh? All it takes is a little forethought and then you will be able to organize and access your adventure photos much easier!
Looking for more photography tips and tricks? Check out my photography 101 series and follow along with eat.live.make on instagram, Facebook and Pinterest!
//
THANK YOU, MEGHAN!
And I had to add this promo video of Meghan’s here, because her work is gorgeous, it helps you get to know her a little better, and it makes me smile every time I watch it. :)