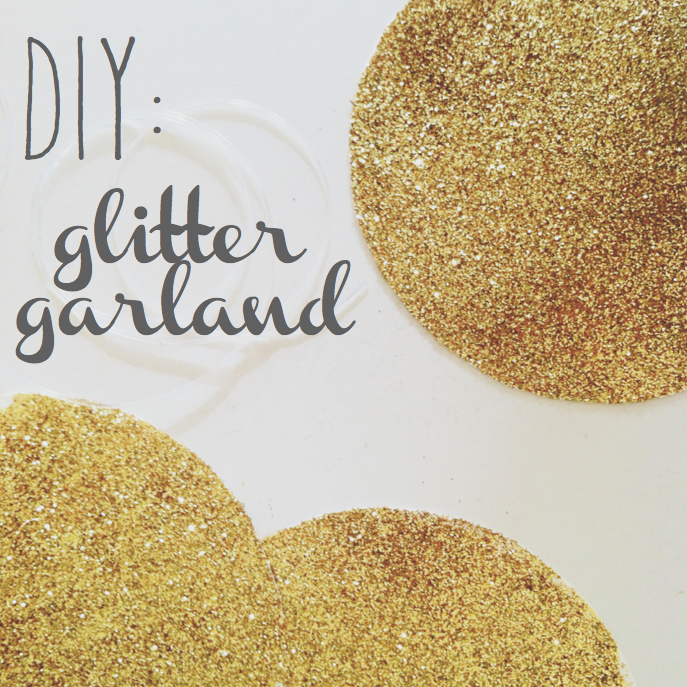
WHO LOVES A PROJECT?!
Well, goodness, I think everyone loves a good project every now and again.
But the real question for this post is WHO LOVES A GLITTER PROJECT?
I DO.
And ultimately, I think you do too.
A necessary precaution: Before you start this insanity of a project that is glitter garland you must come to terms with the fact that once you commit to a glitter project, you will ultimately be committing to a lifelong marriage with glitter. Or, at least, a week-long marriage. Which is just as serious in my humble opinion.
And so, lest you forget, you must remind yourself that glitter is amazing. When you’re elbow deep in glitter, just keep telling yourself that.
Anyways, onward!
+
HOW TO MAKE GLITTER GARLAND >>
You will need:
cardstock
scissors
modge podge glue
foam brush
glitter (!!)
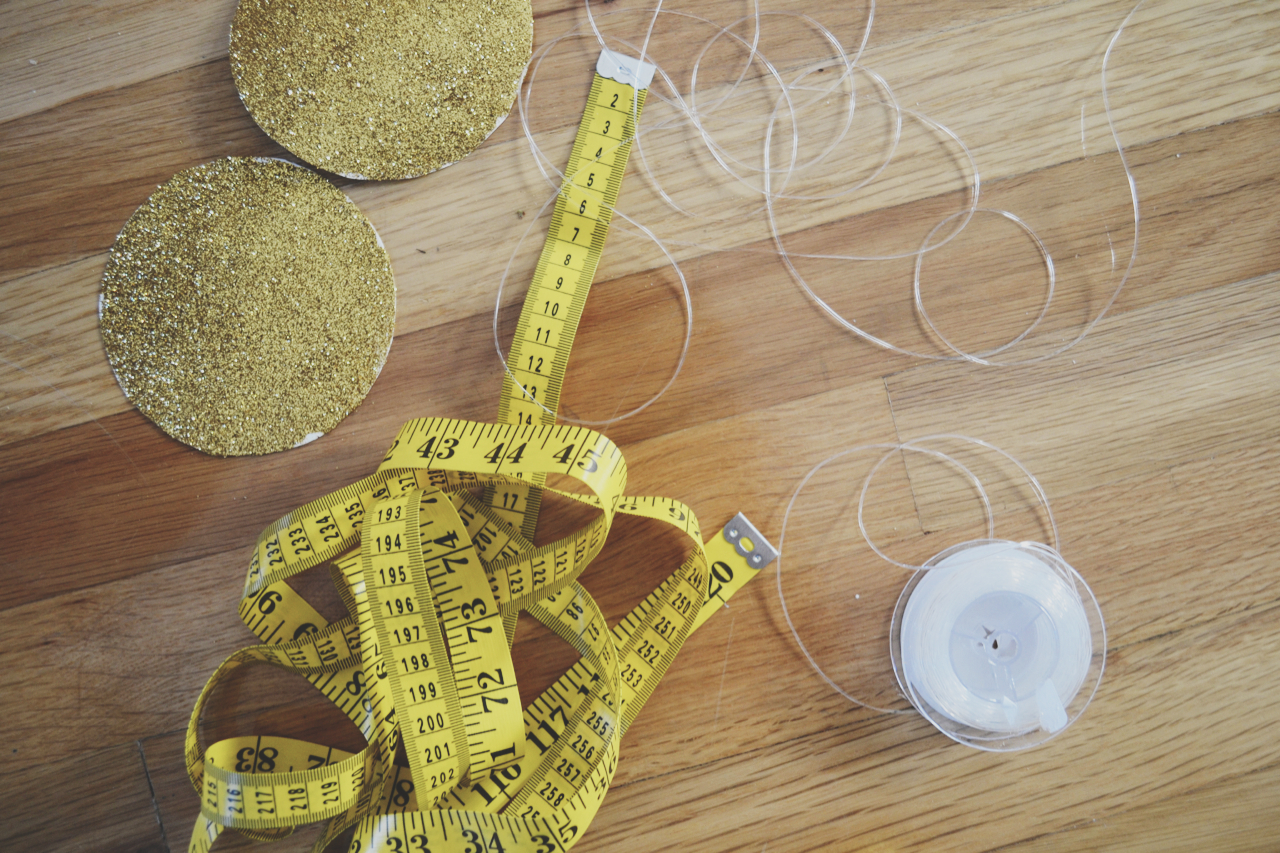
measuring tape
fishing line (or clear craft string)
glue gun
Instructions:
Step 1: Get cardstock paper.
Step 2: Figure out what size you want your circles to be. I basically just found a candle lid that I thought was an appropriate size (4 inches across) and traced it on the cardstock.
Step 3: Decide how many garland strands you want to make. I made 8 because I made the craaaazy decision to dress up my entire dining room (it looks awesome P.S.). For my project, each single strand of garland had 5 glitter circles.
Step 4: Once you decide how many glitter circles you want on your garland, cut out double that many circles. So, for me, one garland had five glitter circles, so I cut out 10 circles of cardstock. Understood?
side note: Since I made 8 strands of garland, the math tells me I cut a total of 80 circles. Which is insanity. TGFDC. (Thank God For Dawson’s Creek. Netflix, people. DO IT.)
Step 5: Take one piece of circle cardstock and paint one side of it with modge podge (only one side– and don’t skimp on the edges!), then press the cardstock to the glitter. I put the glue and the glitter into paper plates (see below) to make it easy. I also had an extra paper plate for spreading the glue onto the cardstock. Once you’ve painted one side and doused it with glitter, put it to the side to dry.
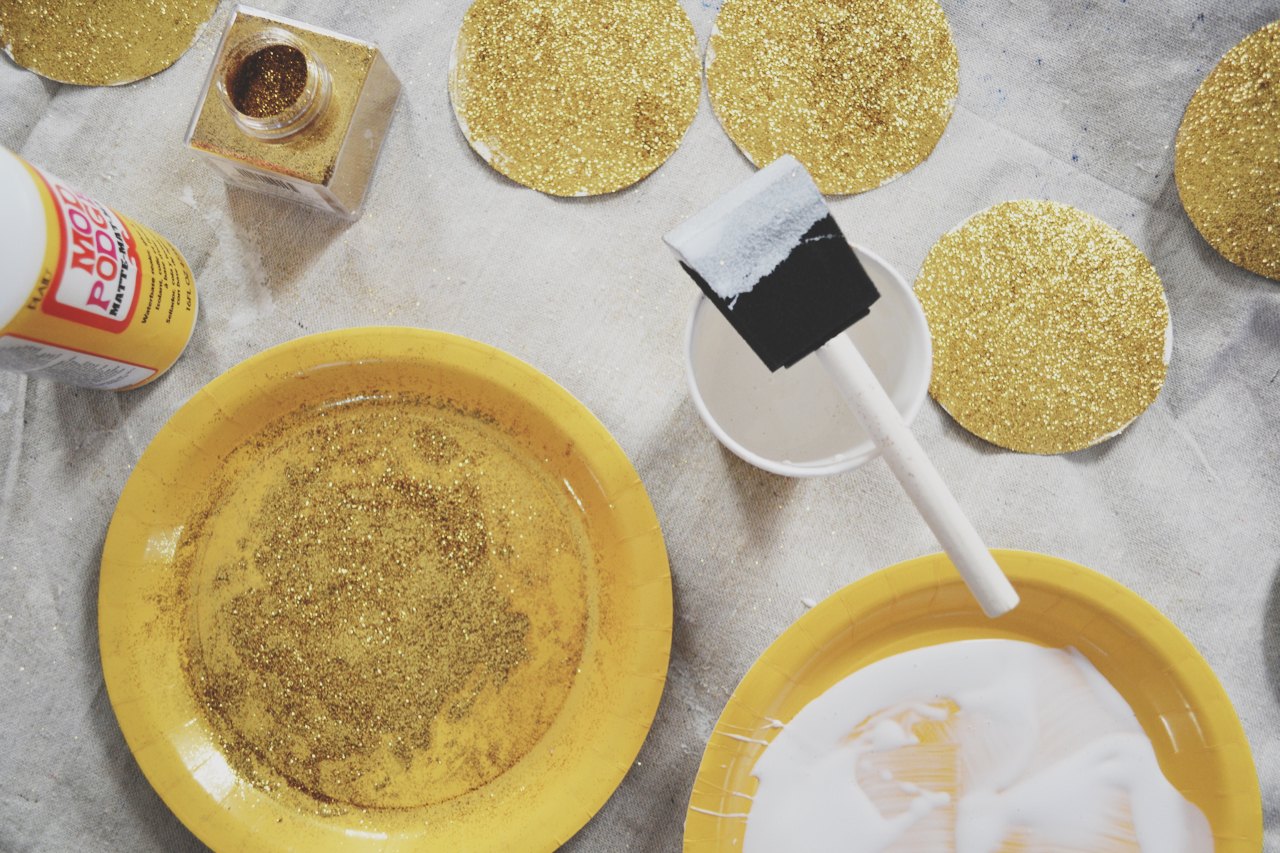
Step 6: After you paint and glitter-up all your cardstock you should have a bunch of circles that have glitter on one side. THIS IS GOOD. I got better and better with applying the glitter the more I did this. By the end, there we no white spots on my circles at all. HUZZAH.
Step 7: Decide how long you want your garland to be and cut a piece of fishing line accordingly. Mine was approx 100 inches long, or so. Maybe a little longer.
Step 8: Use a glue gun to glue two of the cardstocks together (with the fishing line in the middle!), obviously, with the glitter side facing out. Putting two cardstocks together will keep the paper from curling at the sides and keep your circles nice and straight.
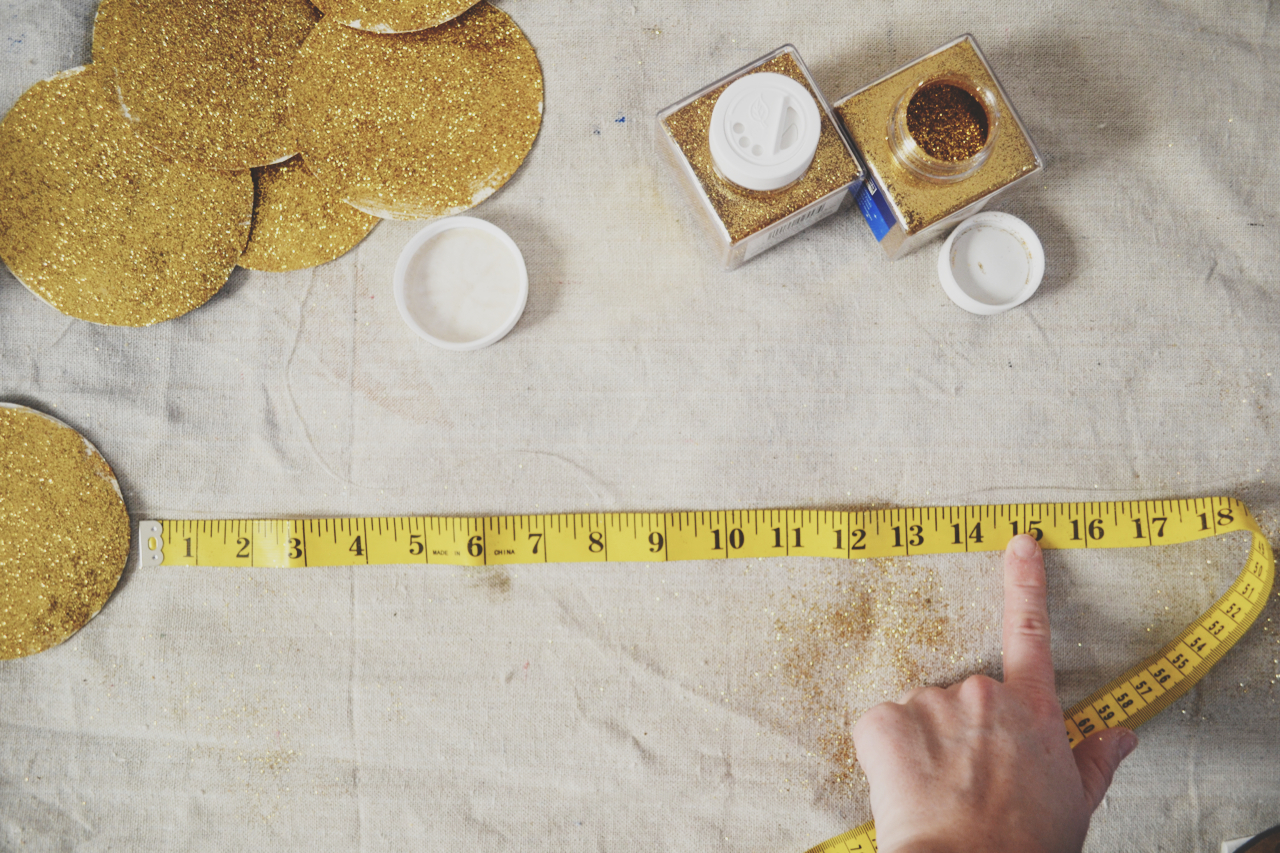
Step 9: Figure out how much space should go in between each glitter circle. I put approx 15 inches between each of mine.
Step 10: Once you have all your circles glued together and spaced out accordingly, hang that sucker up! It will look awesome!
I kept going to make a total of 8 garland. It was a LOT of work and a LOT of glitter, but ultimately it was worth it.
Check it:

Tada! And the picture doesn’t even do it justice. Seriously. I should have you all over for a glass of wine just to show it off. December hasn’t even arrived and it’s getting to be so Christmas up in here it’s CRAZY. When it comes to the holidays, I don’t mess around.
Three cheers for glitter + HAPPY DECORATING!
+
(A note on this project. I saw this picture on Pinterest, which led me to this etsy shop, which was all sold out of this particular type of garland. And so, this DIY was born.)


Ok I’ll admit, I take a long time to get on the glitter train, but once I’m on, it’s over. My husband hates glitter, but our love withstands my glitter projects. haha! I love this garland, you did such a great job!!
Oooh, this is so pretty!!! I want to make one (or eight?!). And yayay for Dawson’s on in the background! I’m still plowing through season three, picking and choosing my fave episodes. SO GOOD.
How flipping adorable! (You’re so right about glitter – herpes of the craft world) I might try this for Thanksgiving!
Obsessed! So making this a Thanksgiving week project. Thank you for the inspiration!
SO cute girl! I love the idea, and I think it’s awesome for the holidays :)
mmmm glitter
this would also be super cute as garland on a christmas tree!
Yessss I was hoping you’d post this! Thanks for sharing! It looks wonderful. I wish I could see it all over the whole room! I’m sure the amazingness of all the glitter is impossible to photograph. This DIY was also way less complicated than I thought it would be! Seriously considering this in this year’s Christmas decor…
Oh my! This looks amazing!! I feel like I need to get in the holiday spirit ASAP just to keep up!
I’m completely amazed at your project dedication and don’t want to burst your crafting bubble, but in the future, if you don’t want to have SUCH an intimate relationship with glitter, there is PRE-glittered cardstock out there: http://amzn.to/SZhqJX . FYI :) Happy crafting!
First, this is so gorgeous I want to make it. Secondly I just had to watch the sketch by Dimitri Martin where he refers to glitter as the herpes of craft supplies. So true.
So adorable. I have a sneaking suspicion my glitter-loving kid will love this craft too!
I LOVE IT! I think I need some of this in my apartment…. just in time for the holidays too!!
adorable Anna!!!!
http://threadtheneedleblog.blogspot.com/
it came out so beautiful. Can you lay on the floor and take a shot from underneath? That would be great. Or I’ll have wine. Whichever.
this is soooooo pretty. my mom is having a christmas party this christmas eve, maybe i will attempt to make her a green & red version!! Thanks for sharing :) xoL
SO FUN Anna! You’re a do-it-yourself-ninja!
I’ll come over for wine!
so i am the least crafty person in the world and probably won’t be doing this BUTTTTTTTT i will take you up on coming over for that glass of wine ;)
randomly – i love foam brushes. i totally forgot that until i read this.
lastly – i would love one of these. so i’ll wait for the etsy shop to restock OR for you to sell me one :)
This is so cool, I of course had to pin it to Pinterest. :)
such a cool DIY. great for a party!
grace
http://herumbrella.com
So glad you did this…I like the way yours looks better! In the photo it kind of looks like they are shooting out from the center like beams. So cool!
can you lay down in the middle of your room and take a picture looking up. I would really love to see that view of your garland. unless of course your ceiling is horribly ugly.
I’m honestly just scared to death about how long it might take me to complete this…
Wow! They’re so beautiful! Well done.
OMG. THIS TURNED OUT SO WELL, i’m sure people would pay for this just as much if not more than the one you were originally going to buy :)